Wednesday, June 24, 2009

Upcycling Glass Jar

Today I am sharing the technique I used to create the toothbrush holder written about in my last post.
  

1. Draw out the design you want on a piece of paper. Make sure before drawing that you fix the width of your drawing as per the size of the bottle you want to paint. We don’t want any pattern overlaps now!

2. Affix this paper inside the bottle using tape so that when you paint on the outside, the design doesn’t move.

3. Now paint directly or draw out outlines using a non-permanent marker. 4. Fill in all the details of your design, including a background. Tip: If you want to add a background to your creation, then ensure you start the painting process with that. It’ll be easier to paint on the design details over the background color rather than make your background fit in with the lines of your design. The second alternative if you are using a wide-mouth jar is to paint in the background color from the inside of the bottle. 5. Enjoy your creation! :)

P.S. - Remember the bottle-vases I painted a few months back? You can catch them in action here.

Monday, June 22, 2009

Painted Toothbrush Holder

Have just finished painting on a jam bottle with my ceramic paints. And voila! It has metamorphosed into a toothbrush holder for the kids’ bathroom.

Froggy with his red umbrella and the giant mushrooms all add a dash of fun to the morning chore of brushing, making it that much easier for the kids and us.


This time I tried a more complicated design than my previous attempts at painting on glass bottles. And learnt some invaluable lessons.

I used Fevicryl’s ceramic paint pack which comes with basic colors. The paints are so quick-drying that you cannot work with them under a fan. Mixing colors is also pretty tough since you have to constantly keep thinning them with water else they dry up. And all that water wrecks color consistency.

So while this activity requires immense patience and a fair amount of careful planning before you start, the end result more than makes up for it. When my kids saw their new brush holder, they made friends with Froggy instantly and loved the mushrooms. :)


I’ll share the technique I used to paint this bottle in my next post.

Thursday, June 11, 2009

Making A Paper Parasol

Try these easy-to-make paper parasols at home for your kiddy parties. They do not have wooden spines like the commercially available ones. But if you use stiff paper, you can get the right look anyway.

The steps are:

1. Cut a circle of 1.5"-2"(inches) diameter out of stiff paper. I used both card paper from a pamphlet and glossy newspaper, and both worked for me.

2. Fold it neatly into half, making sure the edges match perfectly.


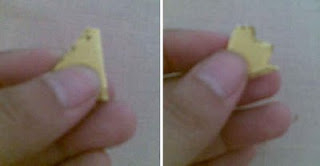
3. Fold it into further halves, twice over, so you are left with something that looks like this.


4. Now take a pair of scissors and snip off a tiny bit on the top. This will form the centre of the parasol or umbrella, from where we can slip in the straw.

5. Turn your scissors to the broad arc of the circle and cut out a jagged motif, so that when we open the folds, it forms a decorative pattern. You can be really creative here and create motifs as you like. Or use a pattern scissor to help.

6. Open the folds of your paper parasol and fit it right below the bend of the straw.


Go on, serve the drinks! What are you waiting for?? Oh, the compliments… they’ll come soon! :)


Wednesday, June 10, 2009

Paper Parasols For Pool Parties

Hosted a pool party for the kids last weekend. Nothing too special, just some early morning skinny-dipping to cope with the searing summer heat.

The kids had fun splashing around, playing ball and having their pina coladas in the pool. :)
But then a momma's got to add her own special touch, so I decided to spruce up the drink glasses with paper parasols. You know, the kind of umbrellas that come with your cocktails...


The only catch being that I made these myself, entirely as a spur-of-the-moment creation.
They make a fun project for kiddy parties, and are so easy that even a 3 year old can make them. How did I make them? Catch the steps in my next post, as I take you through the process.
Till then, go take a splash! :)

Tuesday, June 2, 2009

How To Make A Birdhouse

As I shared with you in my last post, I recently created a paper-mache birdhouse for putting up in our new house. Here I take you through the paces.


Just follow the steps below to create your own birdhouse using cardboard and paper.

  1. Take a cardboard box; candy boxes do just fine for this. Just make sure the basic shape resembles the shape of a birdhouse. In my case the box was almost square with curved sides.

  2. Fold the top flaps and join them to add a roof to the box. You can also build a roof by sticking extra cardboard pieces on the top using scotch tape or glue.

  3. Now cut a round hole in between the front side; this is where the bird pops its head out from!

  4. Cut a long, rectangle piece of cardboard and tape it right below the hole you just cut. This forms the perch for the bird.

  5. If you want to hang your birdhouse, add a loop of string at the back. I wanted mine propped up from a pot, so I cut out a small hole at the bottom. I’ll later insert a stick into it and push the other end into my pot.

  6. Now tear paper pieces and paste them all over the birdhouse, covering all the areas evenly. Add multiple coats if required.


  7. Paint your birdhouse in attractive colors. I painted mine in shades of cream and brown. So I call my creation the Butterscotch Birdhouse!
I hope to have some more of these beauties around the house in the coming days. :) Will share the progress with you, as always.

LinkWithin

Blog Widget by LinkWithin